Dexcom: How to Remove Transmitter


Table of Contents
- What is Dexcom?
- Importance of Dexcom Transmitter
- Understanding the Dexcom Transmitter
- Components of the Dexcom Transmitter
- How the Dexcom Transmitter Works
- When and Why to Remove the Dexcom Transmitter
- Indications for Transmitter Removal
- Risks of Not Removing the Transmitter
- Step-by-Step Guide to Removing the Dexcom Transmitter
- Preparing for Removal
- The Removal Process
- Post-Removal Care
- Troubleshooting Common Issues
- What to Do if the Transmitter Won't Come Off
- Handling Potential Skin Irritation
- Frequently Asked Questions
- 1. How often do I need to remove the Dexcom transmitter?
- 2. Can I reuse the Dexcom transmitter?
- 3. What should I do if I'm having trouble removing the Dexcom transmitter?
- 4. What should I do if I experience skin irritation from the Dexcom transmitter?
- 5. Can I shower or swim with the Dexcom transmitter?
- About The Author
If you're here, it's likely because you, a loved one, or perhaps a patient of yours is using a Dexcom continuous glucose monitoring (CGM) system. Isn't it amazing how far we've come in the world of medical technology? It's like we're living in a science fiction novel, but it's our reality. The Dexcom CGM system is a prime example of this incredible advancement.
It's a game-changer, a revolution in the way we manage diabetes. It's like having a personal assistant that's always there, always vigilant, helping you keep track of your glucose levels. But, as with all good things, it requires some upkeep. It's not just a set-it-and-forget-it kind of device. Today, we're going to delve into one of the key maintenance tasks: removing the Dexcom transmitter.
What is Dexcom?
Before we dive into the nitty-gritty, let's take a moment to appreciate the company behind this life-changing technology. Dexcom, a name that's become synonymous with diabetes management, is a company that's been pushing the boundaries of what's possible in the realm of CGM systems.
Dexcom is not just a company; it's a group of innovators, researchers, and developers who are dedicated to improving the lives of individuals with diabetes. They've taken on the challenge of designing, developing, and distributing CGM systems that are not just functional, but also user-friendly and reliable.
These systems are designed with a singular goal in mind: to help individuals with diabetes monitor their glucose levels continuously. This is not just about providing data; it's about providing real-time, actionable data. This means you can make informed decisions about food intake, insulin dosing, and physical activity on the fly. It's like having a dexcom cost-effective personal diabetes manager at your fingertips, 24/7.
Importance of Dexcom Transmitter
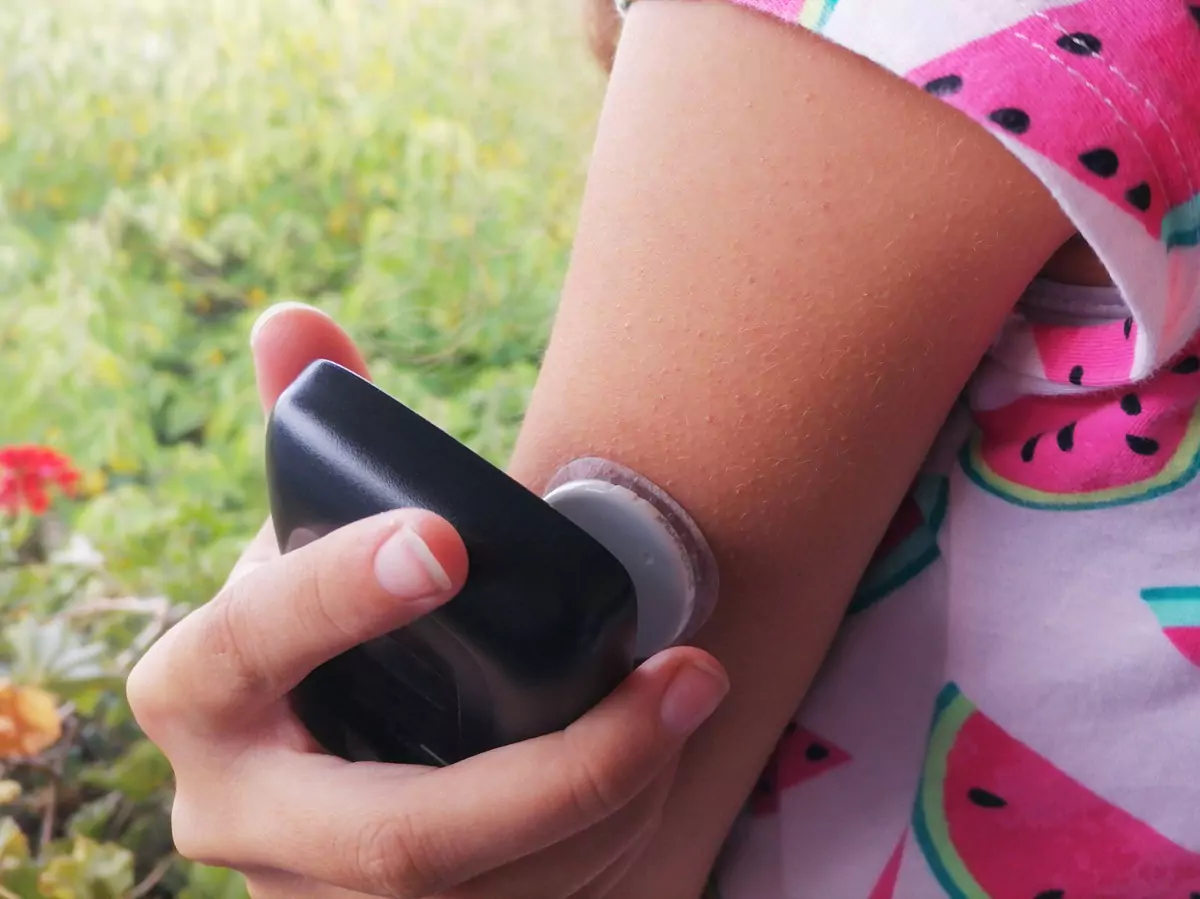
Now, let's talk about the star of the show: the Dexcom transmitter. This little device might not look like much, but it's a crucial component of the CGM system. It's the bridge between the sensor (which is inserted under your skin) and your display device.
It's the messenger, the courier that delivers the all-important glucose data to where it needs to go. Without the Dexcom transmitter, the system would be like a car without an engine, a phone without a signal, a computer without a processor. It's the heart of the system, the part that makes the magic happen. It takes the data from the sensor, processes it, and sends it wirelessly to your display device.
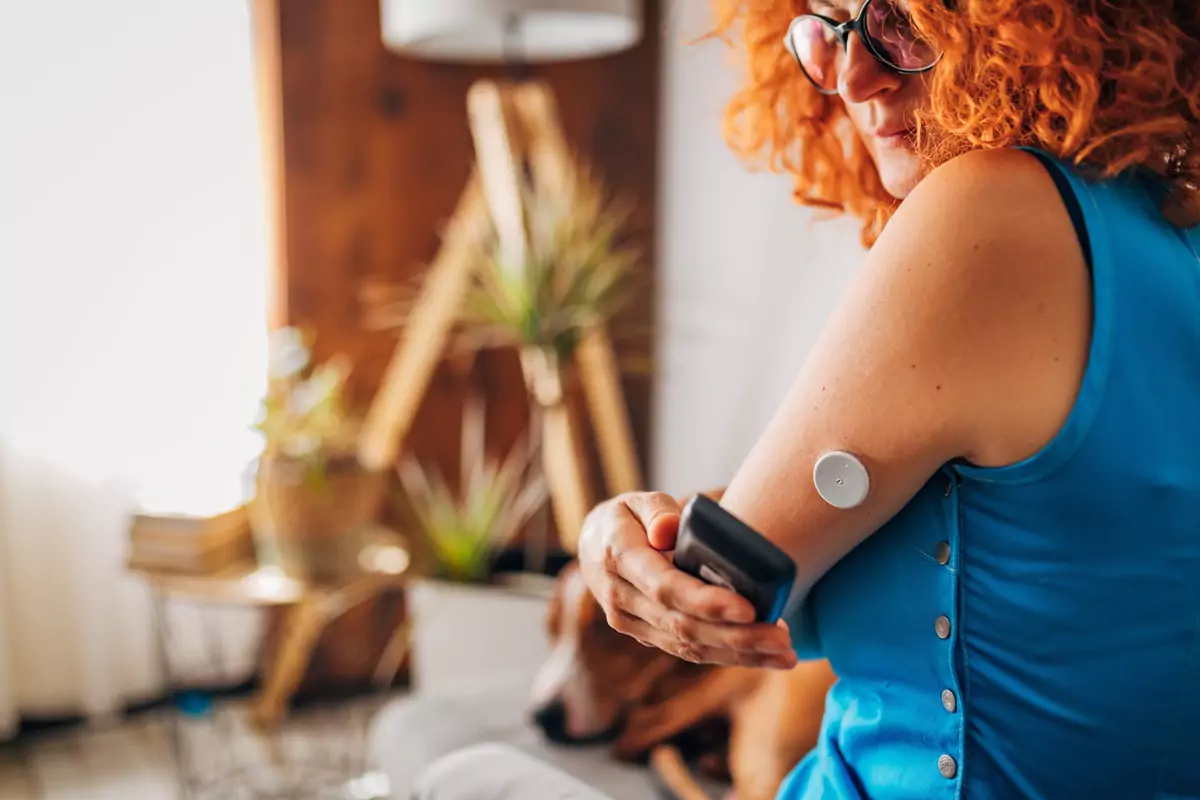
This could be your smartphone, your smartwatch, or the dedicated Dexcom receiver. But the Dexcom transmitter is more than just a data courier. It's also a testament to the power of miniaturization in technology.
Think about it: this tiny device, no bigger than a quarter, is capable of processing complex data and transmitting it wirelessly, all while being attached to your body.
It's a marvel of engineering, a testament to human ingenuity. So, as you can see, the Dexcom transmitter is not just a part of the CGM system.
It's the linchpin that holds everything together, the key that unlocks the power of continuous glucose monitoring. And that's why understanding how to properly maintain and handle it, including knowing how to remove it, is so important.
Understanding the Dexcom Transmitter
Components of the Dexcom Transmitter
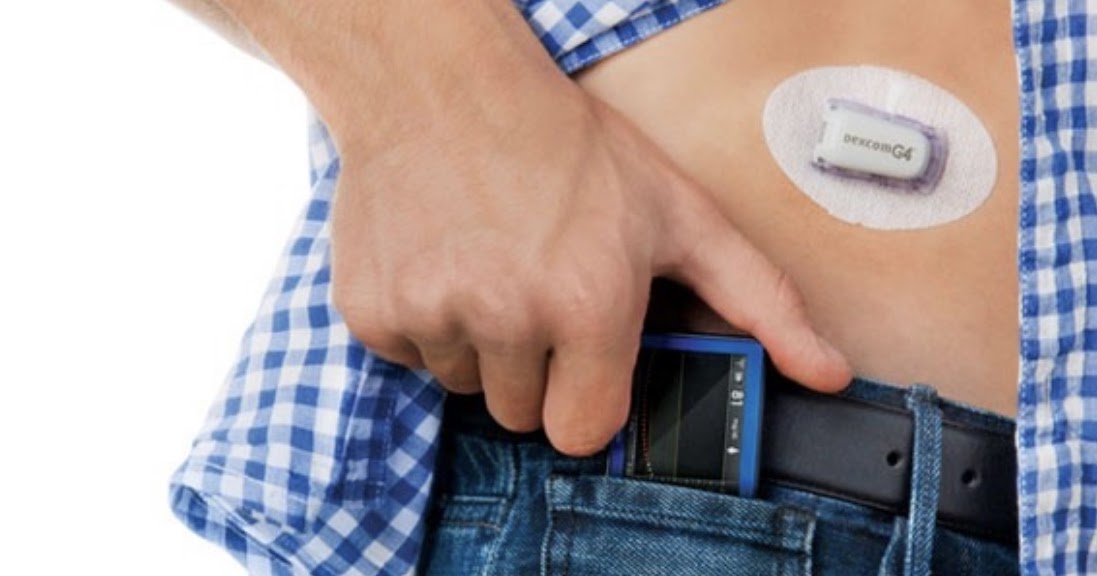
As we unravel this nifty piece of technology, we must first introduce you to its key components. This small, lightweight instrument that rests atop the sensor, known as the Dexcom transmitter, consists primarily of two critical parts. First and foremost, the transmitter itself houses the electronics and the battery, the brains behind the operation if you will.
This tiny powerhouse, despite its diminutive size, holds an impressive array of complex circuitry and a reliable battery that keeps the system up and running. This is where all the magic happens, the digital transformation of raw biological data into intelligible information. It's akin to a central processing unit in a computer but engineered to be minute and medically compliant.
The second part, slightly less sophisticated yet equally essential, is the holder. The holder might seem like a mere accessory at first glance, but its significance is far from trivial. It's the unsung hero of the Dexcom transmitter, quietly holding the system together, ensuring that the transmitter firmly attaches to the sensor. This element essentially functions as a trustworthy anchor, preventing the transmitter from going astray while you carry out your everyday tasks.
How the Dexcom Transmitter Works
Now that we've established the key components of the Dexcom transmitter, it's time to dive into the mechanics of its operation, the how, if you will, behind its function. The process is surprisingly simple for such a sophisticated device, but this simplicity hides an underlying complexity that is truly remarkable.
At the heart of this operation lies the sensor, which is the primary source of data for the Dexcom system. This Dexcom sensor continually measures the glucose levels in your interstitial fluid, the fluid that fills the spaces between your cells. This function is crucial, as it's these glucose levels that inform you about your body's sugar levels, a vital metric for those managing conditions like diabetes.
Once these glucose levels have been measured, the information doesn't just remain on the sensor. That's where the Dexcom transmitter comes into play.
Acting much like a relay runner passing the baton, the transmitter receives the signals from the sensor. This data transfer is crucial because it takes the valuable information captured by the sensor and pushes it forward, to the next point in the process.
However, the transmitter's role isn't simply to receive data. It has another job to perform, one that makes the Dexcom system practical and convenient for the user. With the received data, the transmitter sends it wirelessly to your display device. This could be a specialized medical monitor, or perhaps even your smartphone, depending on your personal setup.
In essence, the Dexcom transmitter, though small and lightweight, plays a crucial role in this life-enhancing and potentially life-saving technology. Whether you're newly diagnosed with diabetes, a long-term patient, or a healthcare provider, the understanding of the Dexcom transmitter and its workings can deepen your appreciation of this groundbreaking technology.
When and Why to Remove the Dexcom Transmitter
Indications for Transmitter Removal
It's not a procedure to be taken lightly, as the Dexcom transmitter plays a significant role in the constant monitoring of your glucose levels. Firstly, let's examine the common reasons that call for the removal of the Dexcom transmitter. Undeniably, the most prevalent reason is the completion of the sensor's designated wear time, which generally spans a period of 10 days.
After this time, the efficiency of the sensor starts to wane, and it's recommended to replace it to maintain the precision of glucose level readings.
However, this is not the sole reason for the removal of a Dexcom transmitter. At times, there might be instances where the transmitter begins to malfunction, causing a significant interruption in the measurement and reporting of your glucose levels.
In such a situation, removing and replacing the transmitter is an essential step to rectify this issue and ensure that you continue to receive accurate readings essential to your health management.
In other cases, the Dexcom transmitter might become a source of physical discomfort, perhaps causing skin irritation or general uneasiness. Allergies, sensitivity, or mere reactions to the transmitter adhesive could be the culprit behind this discomfort.
In such instances, the Dexcom transmitter should be removed immediately to alleviate the discomfort and prevent further escalation of skin irritation. Any discomfort felt, even if it seems minor, should never be ignored, as it can significantly impact your well-being and your experience using the device.
Risks of Not Removing the Transmitter
On the other hand, neglecting to remove the Dexcom transmitter when necessary carries certain risks that can negatively affect your health. One of the primary risks is prolonged skin irritation. Skin under the adhesive can become inflamed or irritated over time if the transmitter isn't removed at regular intervals. This can result in an unpleasant and distracting discomfort that, left unchecked, could possibly lead to infection.
Moreover, the accuracy of your glucose readings might come into question if the transmitter is not replaced regularly. As previously mentioned, the effectiveness of the sensor dwindles after its intended wear time, leading to potentially inaccurate readings. This poses a serious risk, especially for individuals relying heavily on the Dexcom system for their glucose management.
Misinterpreted glucose levels can result in incorrect dosing of insulin or inappropriate dietary decisions, both of which can have harmful repercussions. This is why it is paramount to maintain a regular schedule of transmitter removal and replacement, thereby guaranteeing the highest level of accuracy in glucose readings.
Remember, an effective diabetes management strategy not only includes regular monitoring but also involves appropriately using, maintaining, and, when necessary, removing your Dexcom transmitter. In conclusion, Dexcom transmitter removal should be considered a routine part of your diabetes management.
It should happen when the sensor's wear time is up, or when there are issues with the transmitter's functionality, or in case of discomfort or skin irritation.
Ignoring these indications may lead to inaccurate glucose readings, skin issues, and a compromised experience with the Dexcom system. Stay proactive, listen to your body, and ensure you replace the transmitter as recommended to continue benefiting from accurate, reliable glucose monitoring.
Step-by-Step Guide to Removing the Dexcom Transmitter
Taking on the task of removing a Dexcom Transmitter can feel daunting at first, but with a systematic approach and preparation, the task can be completed seamlessly.
We've formulated a step-by-step guide to assist you in the process and to ensure that your experience is as comfortable as possible.
Preparing for Removal
The preparatory phase, although often overlooked, plays a crucial role in ensuring a smooth transition. Before initiating the process, it's important to assemble the required items. Always have a new sensor and transmitter at hand.
Having these crucial items readily available ensures that you're equipped to replace the old ones immediately. This not only helps maintain continuity in tracking but also ensures you don't leave your skin exposed for longer than necessary. In addition to the new sensor and transmitter, you may also require an adhesive remover.
The adhesive that holds the patch to your skin can sometimes prove to be stubborn, making it difficult to remove. An adhesive remover can help expedite this process, making it easier and more comfortable for you.
The Removal Process
As you gear up to embark on the actual process of removal, start with the essential first step of hygiene. Washing your hands thoroughly ensures you minimize the risk of introducing any bacteria to the area. This is especially important considering you will be working in close proximity to your skin. Following this, the next step involves gently peeling off the adhesive patch from your skin.
This needs to be done delicately to avoid causing any discomfort or potential harm. If you encounter resistance in the form of the adhesive sticking stubbornly to your skin, the adhesive remover you prepared earlier will come in handy. A small amount can help to loosen the stubborn adhesive, allowing it to peel off more comfortably. Once the adhesive is successfully removed, you are ready to extract the transmitter from the sensor.
This task requires a certain level of dexterity. While securing the sensor in place with one hand, the other should be used to carefully lift the transmitter out. It is imperative to remember not to yank or pull too hard. Doing so may not only damage the transmitter, potentially rendering it useless for future use but could also lead to self-injury.
Post-Removal Care
The process doesn't quite end with the removal of the transmitter. Aftercare is an important component to ensure that your skin recovers well. Cleaning the area where the sensor was inserted is a crucial step. This can be done using warm water and a mild soap. The warmth of the water will provide comfort while the mild soap ensures any residual adhesive is cleaned off.
Steer clear of alcohol-based cleaners or other harsh chemicals that may seem like a good idea for sterilization. While they may indeed kill bacteria, they're equally likely to cause irritation to the skin. Hence, a mild soap is the preferred choice. Upon completion of the cleaning process, closely inspect the area for any signs of distress, such as redness, swelling, or other indications of irritation.
If you observe any of these, it's essential to promptly reach out to your healthcare provider. Remember, your health is of paramount importance, and these guidelines are here to ensure your well-being is maintained throughout the removal and replacement process.
Troubleshooting Common Issues
What to Do if the Transmitter Won't Come Off
When your device doesn't operate as expected, it can be a cause for concern. But don't let the apprehension steal your calm. Here's what to do when you face the common issue of the transmitter refusing to come off, and how to support your overall blood sugar health with SugarMD Advance Glucose Support.
First off, breathe. Panic isn't going to help. Rather, let's figure out an effective solution. In the majority of cases, using an adhesive remover can be an immediate fix to this issue. The adhesive remover's primary function is to ease the bond between the transmitter and your skin, enabling a simple detachment process.
But, life isn't always so easy, is it? Sometimes, even the adhesive remover may fail to do its job, leaving you with the same sticky situation. What to do next? Turn to good old H2O. Soaking the attached area in warm water can often do wonders. It might seem strange, but this tried and tested method can work wonders.
Just a few minutes of ge ntle soaking could soften the stubborn adhesive, providing you with a smooth, painless removal. In tandem with these efforts, maintaining healthy blood sugar levels can be a challenge. From carby meals to snacks and even with all the effort, it’s still not enough. This is where SugarMD Advanced Glucose Support comes in handy.
A blend of traditional Ayurvedic herbs, it helps regulate blood sugar levels, curbs cravings, supports weight loss, boosts metabolism and energy. Endorsed by endocrinologists, this unique formula of pure, potent herbs promotes overall blood sugar health. It's ideal for both pre-diabetics and Type 2 diabetics.
Handling Potential Skin Irritation
Now, moving on to another common issue, the potential skin irritation caused by the adhesive used to attach the sensor and transmitter. Unpleasant, isn't it? But it's crucial to understand that this isn't an uncommon issue and there are simple ways to handle it.
In most instances, symptoms of skin irritation manifest in the form of redness, itching, or swelling at the site of sensor attachment. If you find yourself experiencing any of these symptoms, a hypoallergenic adhesive remover could be your knight in shining armor.
Formulated with sensitive skin in mind, hypoallergenic products are designed to minimize the risk of allergic reactions, providing a gentle but effective solution to your problem. On top of this, a skin barrier cream could serve as another line of defense against skin irritation. Acting as a protective layer, it shields your skin from potential irritants, reducing the chance of adverse reactions.
With the combined use of hypoallergenic adhesive remover and a skin barrier cream, the odds of fighting off skin irritation greatly increase. However, despite your best efforts, there may be times when the irritation persists, refusing to back down. In such cases, instead of resorting to internet remedies or allowing the problem to fester, reach out to your healthcare provider without delay.
Constant irritation could signal a more serious issue or an allergic reaction that needs medical attention. So, there you have it. Troubleshooting common issues need not be a Herculean task. It's a matter of knowing the right steps and acting promptly.
When in doubt, always remember that professional help is available - be it your healthcare provider or Dexcom's customer service. These challenging situations are just a part of life's journey, and with the right approach and guidance, you'll be more than equipped to handle them.
Frequently Asked Questions
1. How often do I need to remove the Dexcom transmitter?
The Dexcom transmitter should be removed and replaced every 10 days, or as directed by your healthcare provider.
2. Can I reuse the Dexcom transmitter?
No, the Dexcom transmitter is designed for single-use only and should not be reused.
3. What should I do if I'm having trouble removing the Dexcom transmitter?
If you're having trouble removing the transmitter, try using an adhesive remover or soaking the area in warm water. If you're still having trouble, contact your healthcare provider or Dexcom's customer service.
4. What should I do if I experience skin irritation from the Dexcom transmitter?
If you experience skin irritation, try using a hypoallergenic adhesive remover or a skin barrier cream. If the irritation persists, contact your healthcare provider.
5. Can I shower or swim with the Dexcom transmitter?
Yes, the Dexcom transmitter is water-resistant and can be worn while showering or swimming. However, it should not be submerged in water for extended periods of time.
Remember, while this guide provides a general overview of how to remove the Dexcom transmitter, it's always important to follow the specific instructions provided by your healthcare provider or Dexcom. If you have any questions or concerns, don't hesitate to reach out to them for help.
About The Author
Meet Dr. Ahmet Ergin a highly skilled and dedicated endocrinologist with a passion for diabetes care. Dr. Ergin earned his medical degree with honors from Marmara University in Istanbul. He completed internal medicine residency and endocrinology fellowship at Cleveland Clinic.
Dr. Ergin is board-certified in Internal Medicine, Endocrinology, Diabetes, and Metabolism due to his vast medical expertise. He's a certified diabetes educator, author of "The Ultimate Diabetes Book," and founder of "the SugarMD YouTube channel."
Dr. Ergin offers exceptional diabetes care to his patients in Port Saint Lucie, FL, helping them manage effectively. Disclaimer: These statements have not been evaluated by the Food and Drug Administration. Information on this website isn’t intended to treat, cure or prevent any disease. Discuss with your doctor and do not self-treat.
Written By Dr. Ahmet Ergin
470 total articles
Meet Dr. Ahmet Ergin, a highly skilled and dedicated endocrinologist with a passion for diabetes care. Dr. Ergin earned his medical degree with honors from Marmara University in Istanbul. He completed internal medicine residency and endocrinology fellowship at Cleveland Clinic. Dr. Ergin is board-certified in Internal Medicine, Endocrinology, Diabetes, and Metabolism due to his vast medical expertise. He's a certified diabetes educator, author of “The Ultimate Diabetes Book,” and founder of “the SugarMD YouTube channel.” Dr. Ergin offers exceptional diabetes care to his patients in Port Saint Lucie, FL, helping them manage effectively. For a closer look into his insights and experiences, connect with Dr. Ahmet Ergin on LinkedIn, Instagram, and YouTube.”
Disclaimer: These statements have not been evaluated by the Food and Drug Administration. Information on this website isn't intended to treat, cure or prevent any disease. Discuss with your doctor and do not self-treat.
Products